Applies to Platform: UTM 2.4, UTM 2.5, 4i Edge 2.5
Lst Update: 10th of December 2015
Note
This lesson will illustrate the necessary steps to configure a very simple Net-to-Net IPSec VPN tunnel between two Endian appliances.
Configuration Example

The diagram above is a simple illustration of the configuration example covered in this guide. We'll be creating a Net-to-Net connection to allow communication between the two internal Green (LAN) networks of each Endian device.
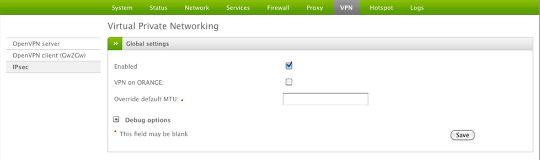
Enable the VPN Server (Site A)

From the main menu, select VPN > IPSec and then check the box to enable the VPN server.
Click Save to continue.
Add a VPN Connection (Site A)

Under VPN > IPSec and the "Connection status and control" box, click the Add button to create a new connection.
Configure VPN Connection Type (Site A)
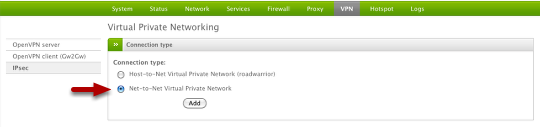
In the next screen, select Net-to-Net and click Add to continue.
Configure VPN Settings (Site A)
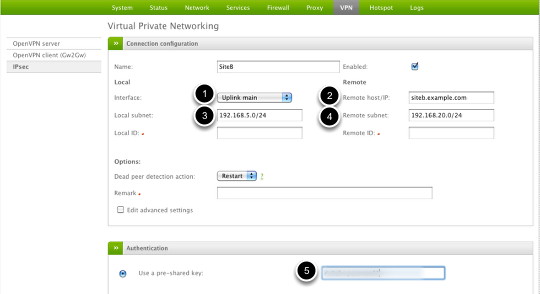
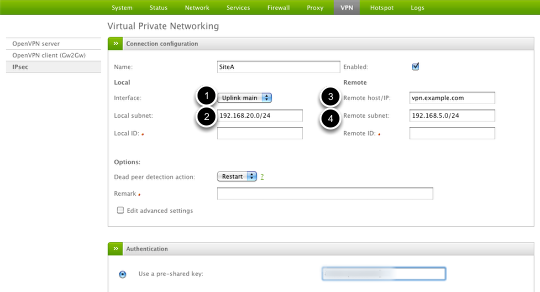
Now we can configure the main settings for this VPN connection.
(1) Select which Internet interface you want to use for this specific connection
(2) Provide the public IP or hostname of the remote VPN device (siteb.example.com)
(3) Edit the local Green subnet (if necessary)
(4) Provide the remote VPN subnet to connect to (192.168.20.0/24)
(5) Provide an authentication method. In this case we're using pre-shared key as this is the simplest and most common method.
Click Save to finish.
Enable the VPN Server (Site B)
From the main menu, select VPN > IPSec and then check the box to enable the VPN server.
Click Save to continue.
Add a VPN Connection (Site B)

On the Endian (Site B) device under VPN > IPSec and the "Connection status and control" box, click the Add button to create a new connection.
Configure the VPN Connection Type (Site B)
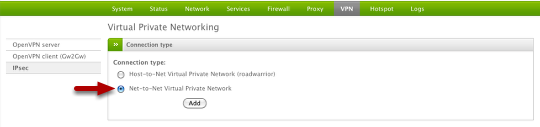
In the next screen, select Net-to-Net and click Add to continue.
Configure VPN Settings (Site B)
Now we can configure the main settings for this VPN connection.
(1) Select which Internet interface you want to use for this specific connection
(2) Provide the public IP or hostname of the main VPN device (vpn.example.com)
(3) Edit the local Green subnet (if necessary)
(4) Provide the remote VPN subnet to connect to (192.168.5.0/24)
(5) Provide the pre-shared key you configured on the Site A device.
Click Save to finish.
Verify Connection (Site A & B)
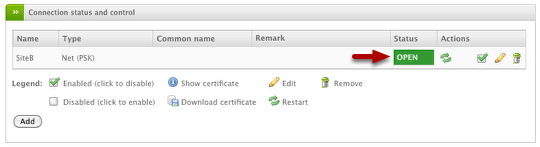
On the Site A VPN device, you should the "Status" go from CLOSED to OPEN which indicates a successful connection.
Test VPN Connectivity (Site A & B)
Now you should be able to successfully test all internal access to remote devices (resources) from both sides of the VPN tunnel. Anything from a simple ICMP ping to an RDP session or remote web server should be accessible across the tunnel.
Commenti