Applies to Platform: UTM 6.x, 4i Edge X 6.x
Last Updated: 12 Apr 2022
This lesson will illustrate the steps necessary to configure all of the network components of the Endian appliance during the Setup Assistant [See Configuration Wizard (Step 1 of 3)].
Endian Network Architecture
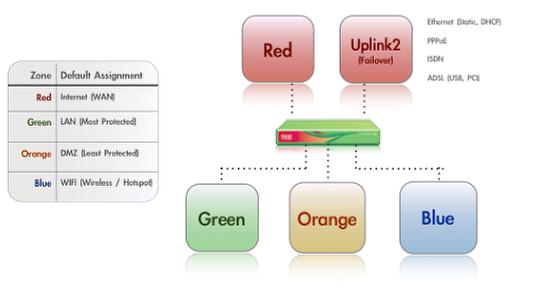
Before we begin the configuration process, please take a moment to familiarize yourself with the color-coded network zones available in the Endian platform and how they are intended to be used (pictured above).
Choose Network Mode
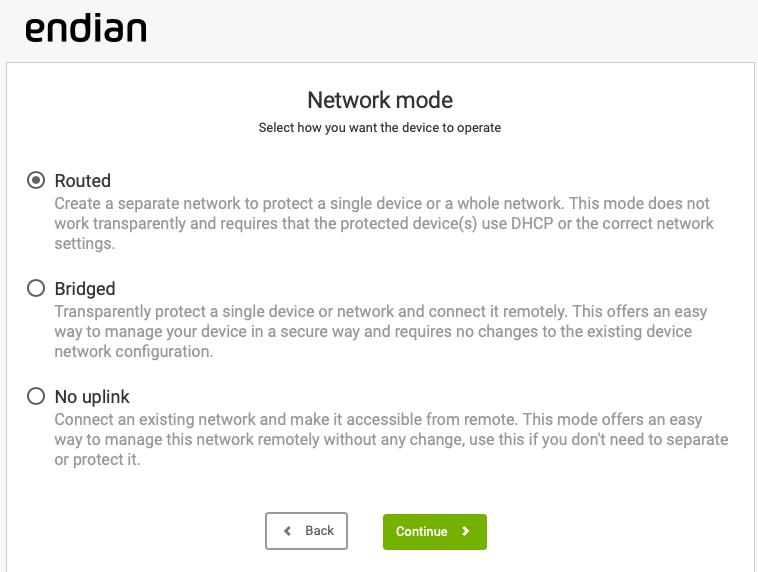
The first step is to choose the network mode which defines how the Endian appliance will function in your network environment. You can choose from the following options:
- Routed: Select this option which is the default and recommended for most deployments. This is used when the Endian will be deployed as the network gateway and provide the separation between Internet and internal networks.
- Bridged: Select this option when the Endian is to be deployed as a transparent bridge on an existing network. This allows the Endian appliance to provide additional services to an existing network without replacing or altering any infrastructure.
- No uplink: Select this option to deploy the Endian as a network LAN client (with no WAN interface). This allows the Endian to connect to an existing network without any changes (e.g. connect a device to a VPN network using existing connection). When using this mode, the Endian appliance can only provide limited protection capabilities.
Click the Continue button ![]() to proceed to the next step.
to proceed to the next step.
Note
Select Internet Connection Type
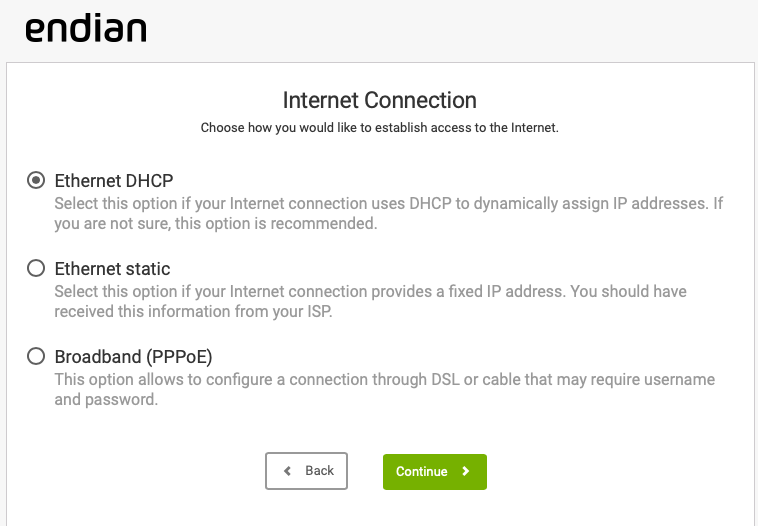
Here you will select your Internet connection type. The options displayed here will depend on the available interface types of your Endian appliance.
Configure Red (WAN) Interface: Static IP
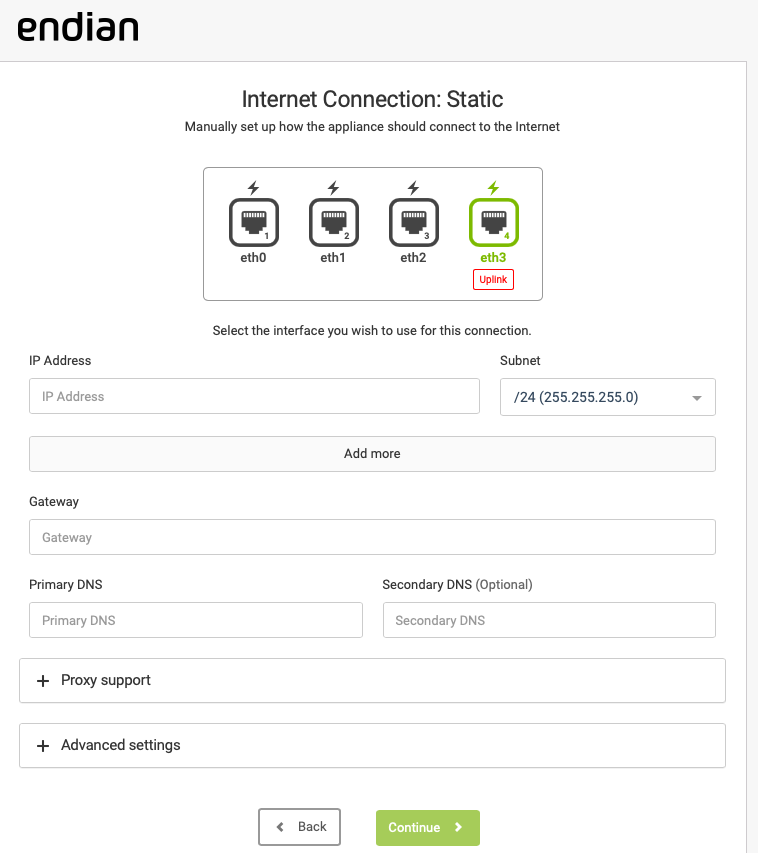
Now you can configure the Red (WAN) interface according to your ISP connection type (as selected during previous step). Here you must select the appropriate physical interface to use for the Red (WAN) connection and enter the WAN IP, subnet, and gateway (if necessary), and fill out any other ISP connection specific fields.
If you have multiple public IP addresses assigned, you may enter each additional IP by clicking the "Add more" button. You should list each individual IP and subnet.
You must also enter your Primary and Secondary DNS servers to use for the WAN connection.
The options under "Advanced Settings" are for Mac address and MTU is to be used only in specific scenarios where required. The option for MAC address is really only useful for situations where your ISP modem has a "sticky" connection and requires that your Internet MAC address always stay the same. This option would allow you to configure the Endian to "forge" it's Red interface MAC address so you do not lose your ISP connection. Under MTU you can manually enter a custom value for interface MTU size and is not recommended unless instructed by your ISP.
Click the Continue button to proceed.
Configure Backup (WAN) Connection
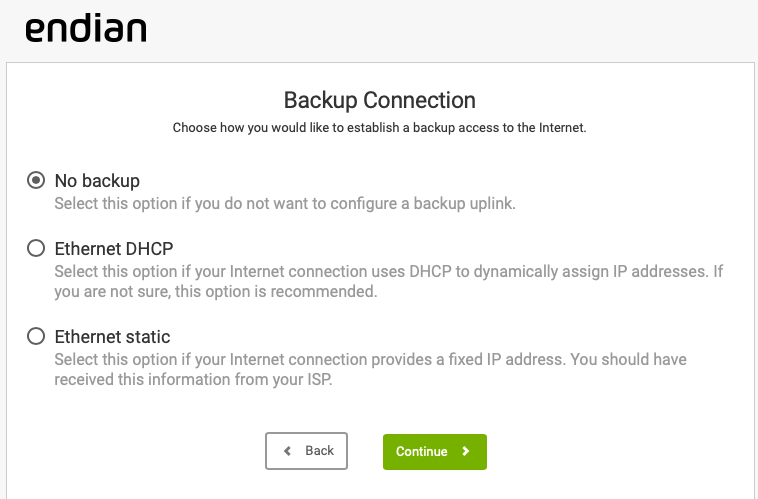
Here you can select whether to configure a backup Internet connection to use for failover in the event your primary Red (WAN) connection goes offline. This option is only accessible when there are sufficient available physical interfaces to utilize for all internal and external networks defined on the Endian appliance.
Assign Network Zones
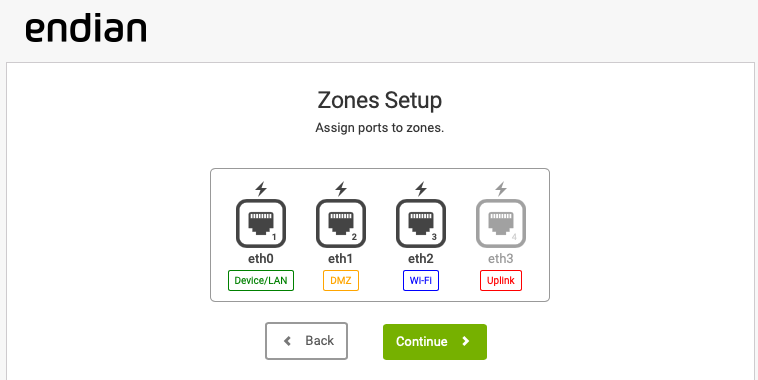
The next option will allow you to select which network zones are assigned to the available physical interfaces on your Endian appliance. To achieve this, first click on an unused interface (shown in black) and subsequently select the zone assignment from the dropdown. You may click to select and also click again to unselect an interface or you may select more than one interface to assign multiple interfaces to the same zone. The available options will depend on the total number of available Ethernet network interfaces on the Endian device. Your options could include adding the Blue zone (Wifi) or Orange zone (DMZ) or both. Click the Continue button to continue.
In this example, each interface is assigned a different zone.
Configure Network Zones
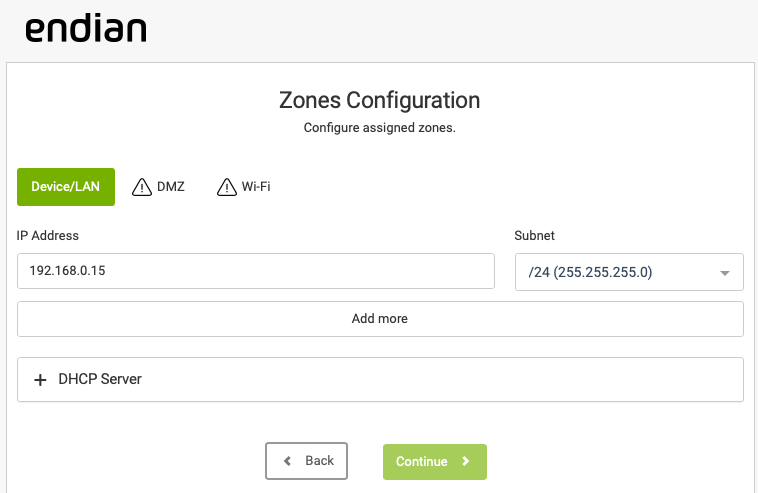
The next step involves configuring the actual IP address you want assigned to the Endian device for each existing network zone. The default Green IP is provided for you but you can use any IP address and subnet you wish. You are also allowed to add additional networks that may co-exist within each single network zone by clicking the "Add more" button. An example of where this might be used is if you host multiple internal subnets that all need to exist within the same network segment (within one zone). You may also configure a DHCP Server by expanding the box and enabling the server then entering the beginning and ending IP address to use for the DHCP pool.
You will need to complete the network configuration for each zone using the zone tabs at the top of the wizard.
Click the Continue button to proceed.
Note
- 10.0.0.0 - 10.255.255.255 (10.0.0.0/8), 16,777,216 addresses
- 172.16.0.0 - 172.31.255.255 (172.16.0.0/12), 1,048,576 addresses
- 192.168.0.0 - 192.168.255.255 ( 192.168.0.0/16), 65,536 addresses
Setup Outgoing Mail Server (Optional)
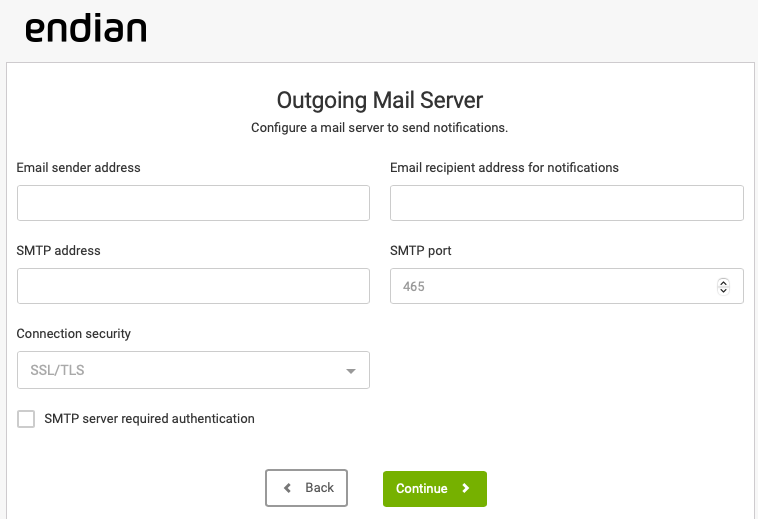
Here you can provide the administrator (recipient) email account along with the Endian (sender) address you want emails from the Endian appliance to use. Also you may specify the address, port and connection security and authentication information of an email smarthost should you require one. Click the Continue button to proceed.
Apply Configuration
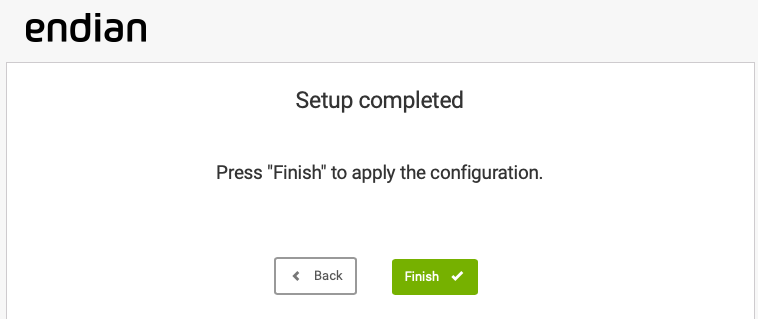
The last step is to apply the configuration to the device. Keep in mind, the changes you made may take up to 20 seconds to be fully applied to the device and for dependent services to be restarted so this may impact any internal device(s) ability to access the device or pass traffic through it. You must access the administration interface of the Endian device using the new IP settings either manually or using the link in the Web UI provided.
Once the network configuration has been successfully completed, you can proceed to register your Endian Appliance to the Endian Network.
Comments