Applies to platform: Switchboard 6.0
Updated on: 16 Nov 2026
Functionality Description
With two-factor authentication, Endian VPN security is dramatically increased. Instead of just requiring a username and password, an additional piece of information is required that is generated by a token. In this case the authentication procedure is a combination of something you know (username and password) and something you have (time-based token). This prevents unauthorized VPN access even in the event your username and password are stolen or compromised since the attacker must also have the token information to successfully authenticate.
General Overview
The following steps are required to enable, configure and utilize two-factor authentication on an Endian Switchboard appliance. Each item will be further described in detail in the remaining article:
- User installs authenticator application on their smartphone (Android, iOS)
- An Endian administrator enables OTP on the Switchboard provider
- There are two ways to enable OTP for users:
- From User: A user logs into the Switchboard web portal and self enrolls.
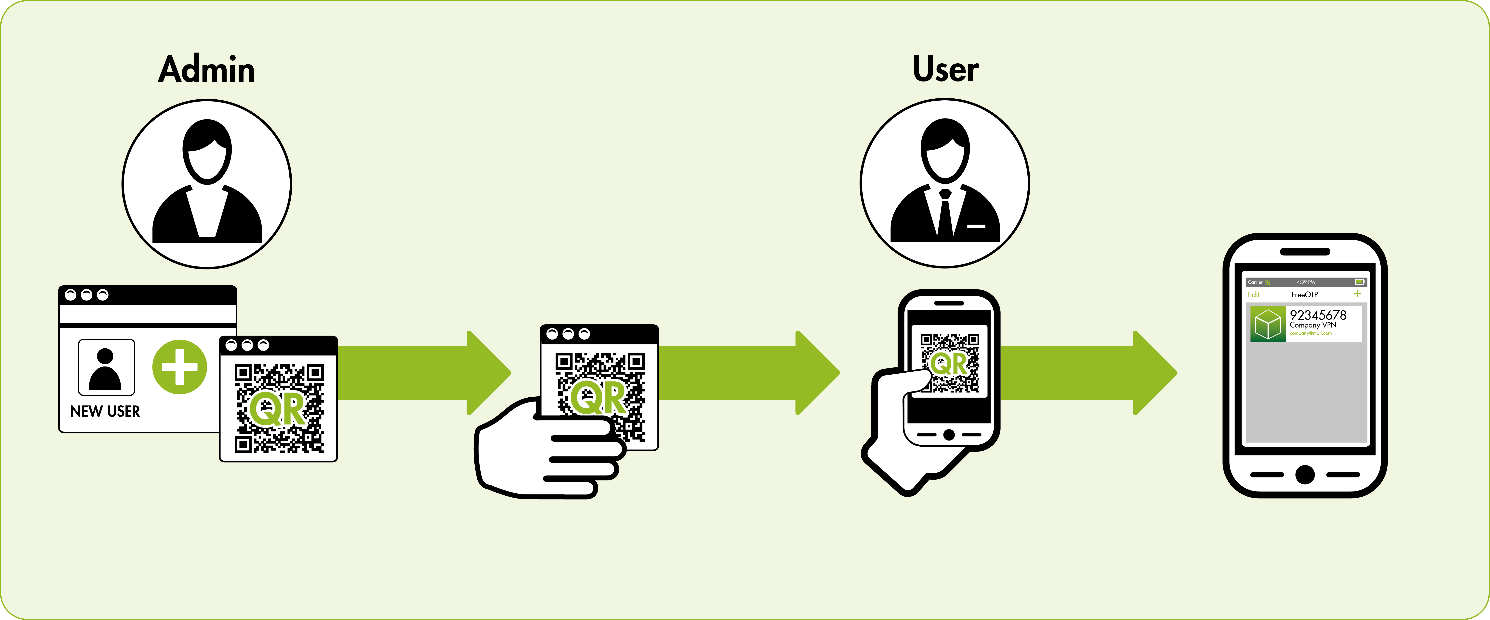
- From Switchboard Administrator: An Endian administrator will enable OTP for a given user(s) VPN account and securely sends the QR code to the user who then adds it to their authenticator application on their smartphone.
- The user can now:
- Login via the Switchboard web portal using their OTP token
- Configure OTP on the Connect App and now login.
User Prerequisite
Before enabling 2FA, all users will need a smartphone application that supports TOTP in order to setup and retrieve the one-time code . A number of compatible smartphone applications are already available. They are all available for free (other applications exist as well, this is only a short list):
| Platform | Apps |
| Android | Google Authenticator, Microsoft Authenticator |
| iOS | Google Authenticator, Microsoft Authenticator |
Enable OTP (on the Switchboard)
In order to use the two factor authentication, the Switchboard provider must be configured to enable multi-factor authentication. To do this, a Switchboard administrator using the web management interface (https://<Green IP Address>:10443) should go to Authentication > Providers menu and click the edit button next to the Switchboard provider.
Note
Enabling this on the Switchboard provider should additionally cover MFA for any credential provider (e.g. Active Directory, LDAP, etc) as well. If using OAuth provider, you should not enable MFA here and rather enable MFA within the settings of your specific provider (e.g. Entra ID, Auth0, etc).
On the Edit page, you can enable OTP by selecting it from the Multi-Factor Type dropdown and click Save.
Once saved, you can then apply the changes by click the Apply Now button.
Configure User MFA
At this point, users are still not required to use two-factor authentication while logging into the Switchboard since they need to setup their account information within their authenticator application. In order to facilitate this, MFA must be enabled for those users requiring it. There are two ways to accomplish this with a Switchboard:
-
Enabled by the User
A Switchboard user can login to the web portal (FQDN) and navigate to their profile page from the user menu drop down (top right of the portal).
Once there, you can then enable MFA by clicking Generate new secret button and to view the associated QR code you can click the Show QR Code button.
At this point, the user can then use this QR code to setup their authenticator application (see below).
-
Enabled by the Administrator
A Switchboard administrator can enable OTP for each user account required and then securely share their account information with the user. To enable OTP for a user, an admin should go to Switchboard > Users and edit the user account. Under the User tab and then you can click the Generate new secret button. To view the QR code, you can click the Show QR Code button and then save (right-click and download) the QR code and securely share it with the user.
If you need to remove OTP for a given user account, you can click the Clear QR Code button.
Configure Authenticator App
In order to generate the one-time passwords, each user has to setup an account in the application. The easiest way to setup an account is to take a picture of the QR code which contains the account information. The application generates a new one-time password every 30 seconds – and since the algorithm is time-based it does not require an Internet connection.
Figure 1 - Generic illustration of creating an account in an Authenticator app
User Login
After having added a One-Time Password secret to the user the login procedure will slightly change. The user must now also provide a valid token provided by the mobile application when logging into the VPN.
From the Switchboard Web Portal:
- Open your browser to the Switchboard web portal (https://<Switchboard FQDN>) and enter your username and password.
-
After doing this successfully, you should get a prompt for entering the OTP token which can be found on the user's smartphone authenticator app.
.
From the Endian Connect App:
-
In the connection profile when you configure the details for the connection to the Switchboard, turn on the field "One-time password enabled" at the bottom of the form.
-
In the main login screen of the Connect App, select the profile and press "CONNECT".
.
-
A pop up will be displayed asking for the OTP token from the user's smartphone application. Enter the token shown on the user smartphone and press "OK".
Keep in mind each token is typically only valid for 30 seconds and the application will typically display a countdown timer to show you how much time is remaining before a new token is displayed..
Comments