Background
This lesson will walk you through the configuration of VPN portal, which acts as reverse proxy. Therefore, it allows you to reach specific servers of your internal network without establishing a VPN connection, but without the risk of exposing them on Internet as by using port forwarding, as with VPN Portal it is possible to use login authentication.
In this example, a VPN Portal will be configured to make two web servers reachable, 10.2.34.5 (SiteA) and 10.2.34.6 (SiteB), from Internet through example.com domain.
VPN Portal configuration
The next steps will show you how to configure VPN Portal referring to our example.
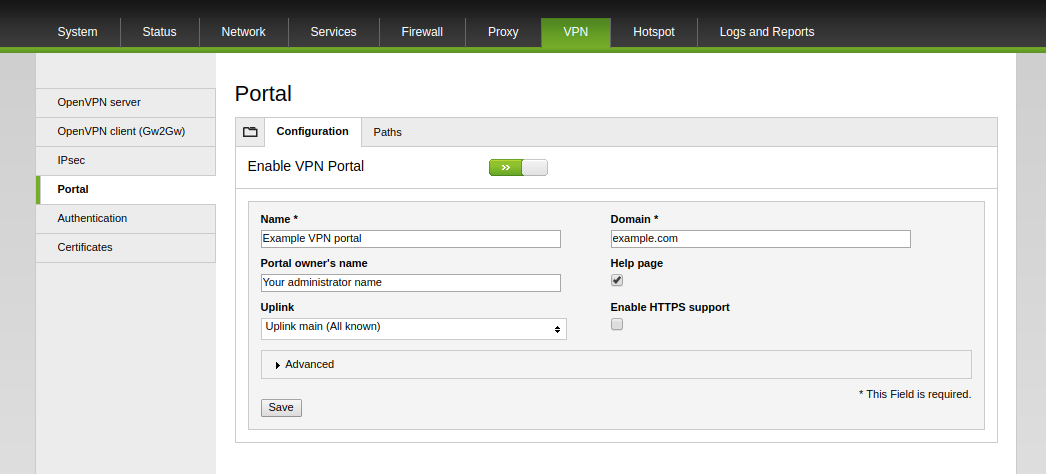
1. Click on VPN > Portal > Configuration, then fill the form as shown in the picture below.
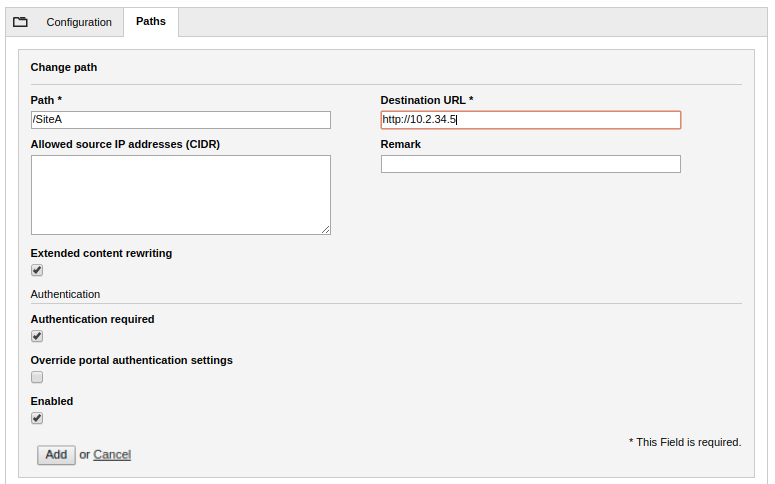
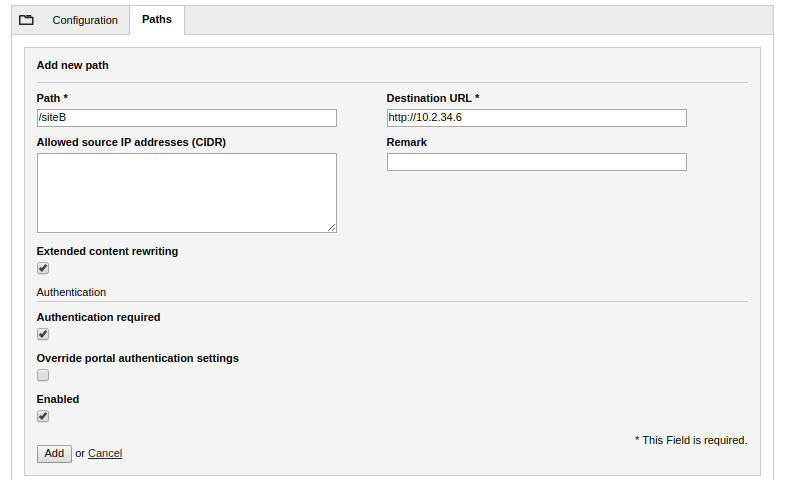
2. Click on Paths to configure each web server, and fill the form as shown below. Remember to tick Authentication required checkbox to require authentication when connecting to the web server.
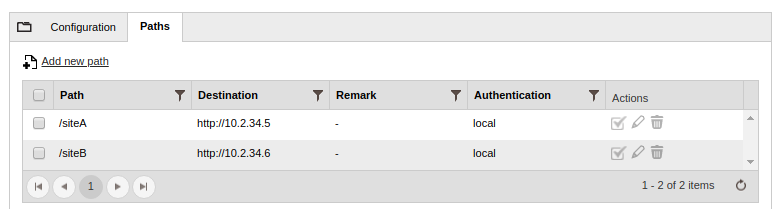
Once both paths are correctly configured, the list will show both paths:
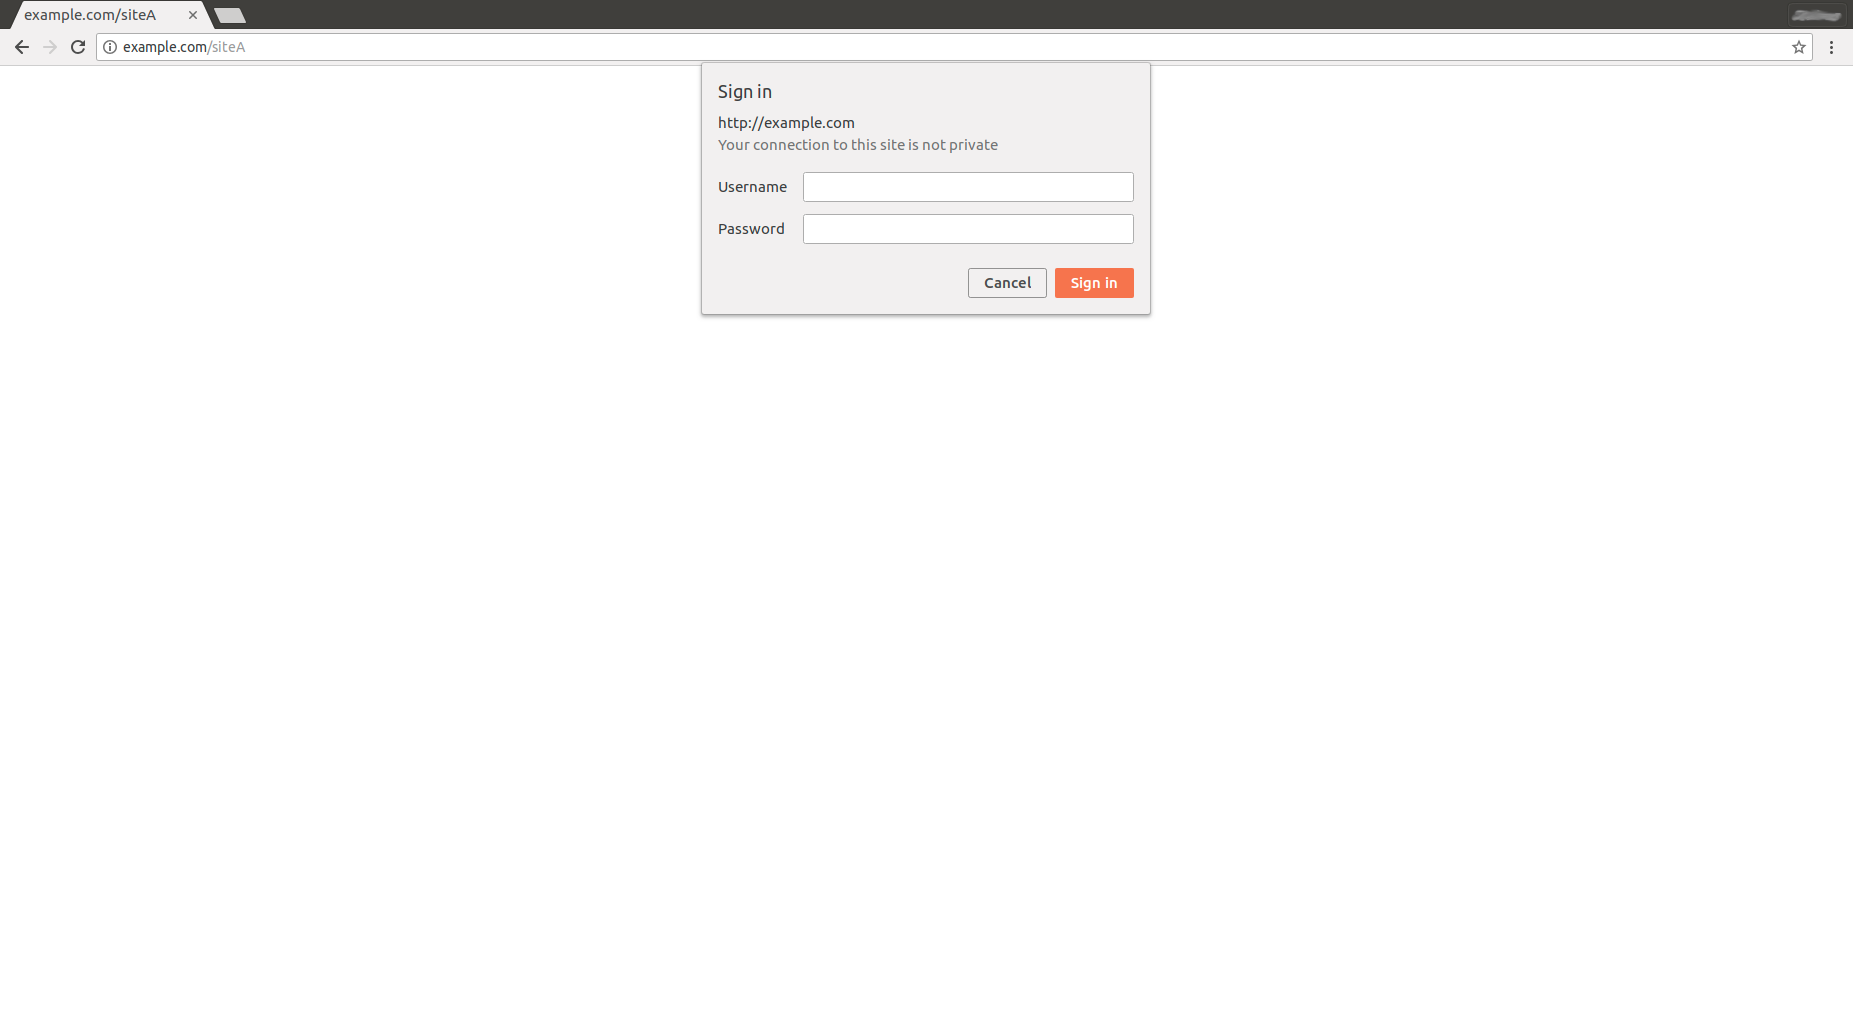
3. The VPN portal configuration is complete. To test it sticking to our example, trying to connect to http:///example.com/siteA from a web browser will bring you to 10.2.34.5, and If authentication required is active, there will be asked to sign in before accessing the web server.
Such authentication is a local authentication, whose enabled users are configurable under Menubar > VPN > Authentication.
Comments