Background
Configuration Example
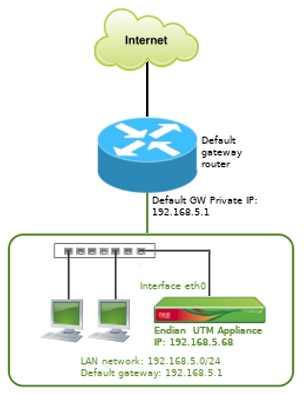
The diagram above is a simple illustration of the configuration example to which this guide will refer. As shown in our configuration example, Endian UTM Appliance is connected directly into the LAN switch because it will act as a common server inside the LAN network. As previously explained, all the clients that will need to communicate with Endian UTM Appliance set on No uplink mode will need to target Endian UTM Appliance IP address (which is 192.168.5.68 in our example).
We will setup Endian UTM Appliance on No uplink mode by following network setup wizard steps.
Choose No Uplink Mode
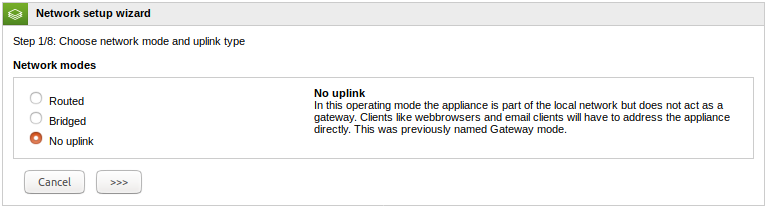
Select No uplink mode, then click Forward button  to continue.
Add network zones
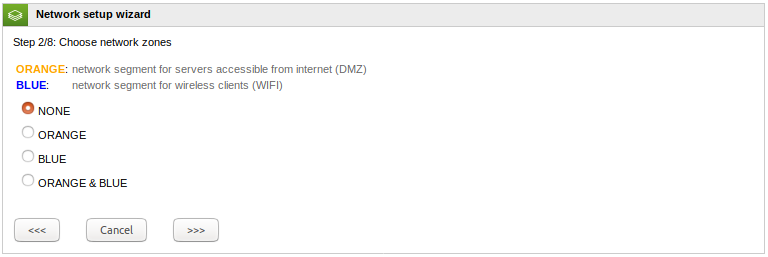
Following our configuration example, click Forward button to continue.
Configure Network Interfaces

The next step involves configuring the actual IP address you want assigned to the Endian UTM Appliance.
Following our configuration example, we will proceed with the following settings:
- Fill the text field IP address with the IP address you want to assign to Endian UTM Appliance. This address must not be already used by other devices into the network.
- Choose network mask as you need. In our case, we have to set network mask as /24 - 255.255.255.0.
- Select the interface you want to utilize for No uplink mode. In this mode, we have to select only one interface so, following our configuration example, we selected interface eth0.
- Assign an Hostname and Domainname as you need.
Once finished, click Forward button to continue.
Configure Outgoing Interface
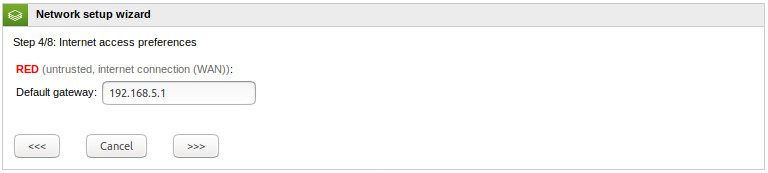
Fill Default gateway with the address of the default gateway of your network. In our case, we are supposing the default gateway of our LAN is 192.168.5.1.
Once finished, click Forward button to continue.
Configure DNS

Set the DNS that you wish to use, to let Endian UTM appliance to resolve hostnames.
Once finished, click Forward button to continue.
Setup Email Information (Optional)

Here you can provide the administrator (recipient) email account along with the Endian (sender) address you want emails from the Endian UTM Appliance to use. Also you may specify the address of an email smarthost should you require one.
Once finished, click Forward button to continue.
Apply Configuration

The last step is to apply the configuration to the UTM Appliance by clicking OK, apply configuration. Keep in mind, the changes you made may take up to 20 seconds to be fully applied to the Endian UTM Appliance and for dependent services to be restarted so this may impact any internal device(s) ability to access Endian UTM Appliance. You must access the administration interface of the Endian UTM Appliance using the new IP settings either manually or using the link in the Web UI provided.
Comments