Last Update: 28 April 2011
This document will walk you through setting up the Endian hotspot to run with SmartConnect (self-service) so users can create their own accounts and access the Internet. This particular example will demonstrate the process using paid tickets with PayPal integration.
Add SMS Bundle Code
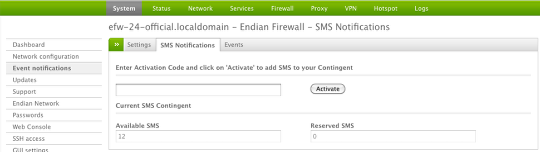
Before you can use the SmartConnect (self-service) feature, you must add an SMS bundle that you purchased from your local Endian partner. Once this is done, you can track your usage from the screen above and add new bundles when necessary.
Warning
Create a ticket
The first thing you need to do is to create the ticket(s) users will be allowed to select during their registration. These can be time-based or usage-based (bandwidth) and you can have as many or as few as you need.
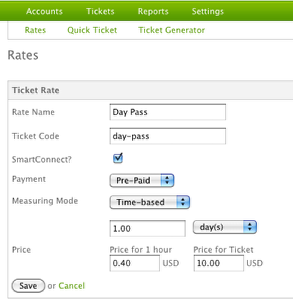
From the hotspot administration interface, select Tickets > Rates > Add Rate and you will be presented with a ticket creation form.
Provide a ticket name (generic) and a ticket code and ensure the checkbox for SmartConnect is ticked as this will allow user self-service. Next select Pre-Paid as the payment method and then choose the appropriate measuring ticket mode. Using Time-based tickets allows you to set a time limit on the validity of a ticket (minutes, hours, days) whereas Trafffic-based allows you to provide a set bandwidth limitation per ticket. In this example, we've select a Time-based ticket length of 1 day so each user will get a day pass of Internet access for $10.
Click Save when you finished.
Configure Hotspot Settings
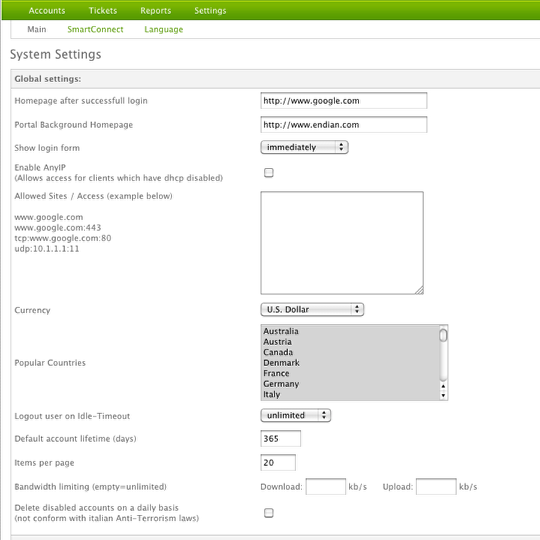
Next, we'll set the basic parameters for the hotspot. Select Settings from the hotspot administration interface.
The main configuration options to be concerned with on this page are:
(1) Homepage (URL) that the user will get sent to after successfully logging in
(2) Portal Background homepage (URL) that will be displayed in the background of the hotspot portal (prior to logging in). This must be a valid and accessible webpage (URL).
(3) Logout user on Idle-Timeout which determines after how long an idle hotspot users get automatically logged out (select unlimited if you want to disable this feature).
See the Endian manual for more specific information on these fields: http://docs.endian.com/2.5/hotspot/admin/settings.html
Configure SmartConnect Settings
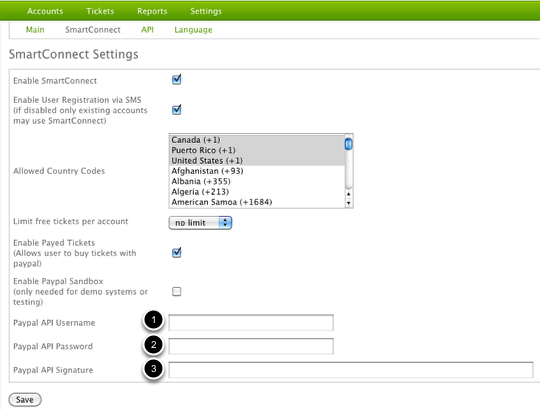
Now we'll configure the SmartConnect (self-service) feature which will allow users to create a user account, select a ticket, process payment when necessary, and provide login credentials to the hotspot portal. Select Settings > SmartConnect and be sure the first two items are checked and then specify which country (phone) codes are allowed to register. You can also restrict the number of free tickets distributed based on time (e.g. one free ticket every 30 minutes).
To integrate with PayPal for payment processing, you'll need to setup an account with PayPal and provide your (1) API Username, (2) Password, and (3) Signature. Please review the lesson on "How to Setup a Business PayPal Account" for more detailed instructions.
Customize the Hotspot
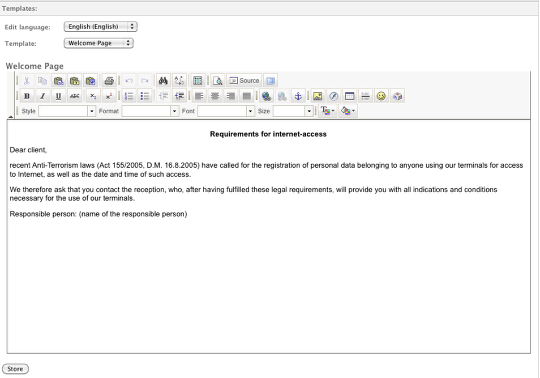
The last step is to customize the text displayed in the various hotspot portal screens. using the built-in (HTML) WYSIWIG editor found under Settings > Language. The first is the "Welcome" page which by default contains a disclaimer but you can modify this to introduce your company or service, perform advertising, or whatever else you prefer. The other options you may want to customzie are the "Terms of Service" which the user must accept prior to logging into the hotspot or the "Help" screen to provide advice, tips, or contact info. to your users.
SmartConnect Logging
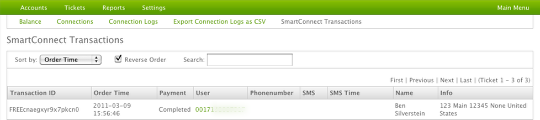
You can track the SmartConnect registrations by using the Reports > SmartConnect Transactions window (shown above). Here you can see transactions, registration status, SMS info, user info, and more.
Hotspot Client View

Now you're hotspot users should get automatically redirected to the captive portal page. From here, they can register, purchase tickets through PayPal and access the Internet through the hotspot.
This how-to it's valid for EFW 2.5 but we need to explain how-to configure the smartconnect function with email address verification.