Applies to Platform: UTM 2.4, UTM 2.5, 4i Edge 2.5
Last Update: 15 July 2015
Applies to Platform: UTM 3.0, 4i Edge 3.0, UTM 5.0, 4i Edge 5.0
Last Update: 15 July 2015
This configuration guide will illustrate how to enable and setup the IPS engine on the Endian.
Enable the IPS
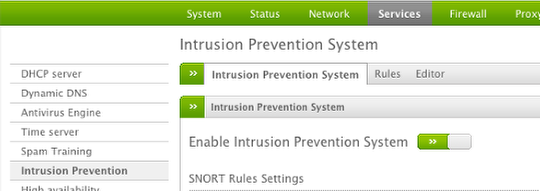
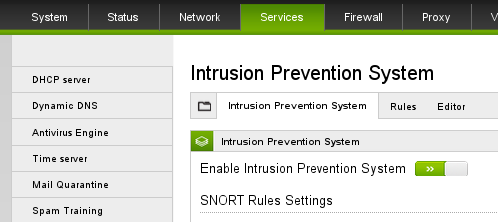
The first step is to enable the IPS engine by clicking the gray button (turn to green when enabled).
Configure the Settings & Update Ruleset
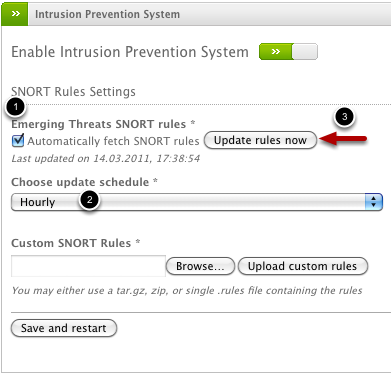
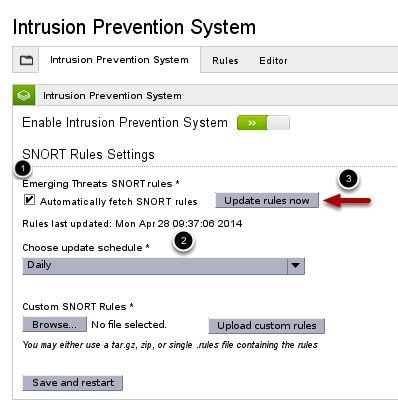
(1) Now we can enable updates to be fetched automatically by checking the box
(2) Next select the update schedule (hourly, daily, weekly, monthly). We recommend the default (hourly) as that provides the highest level of security
Click Save and restart before you proceed.
(3) Last is to actually update and install the initial ruleset by clicking the Update rules now button
Note
Review & Configure the Rules (by Category)
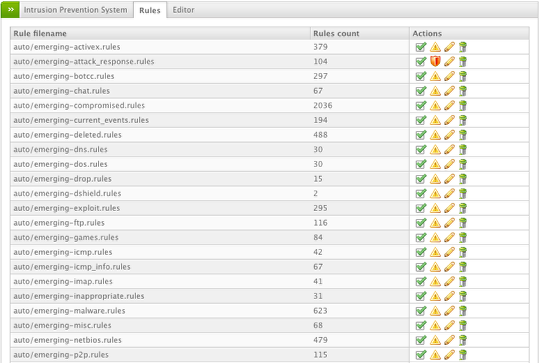
Next you should review the available categories of rules (and rules themselves) and determine which rules you want deployed in log&pass (IDS, Intrusion Detection System) mode and which you want in log&block (IPS, Intrusion Prevention System) mode. You can review the categories from the Rules tab of the interface and toggle the mode (pass or block) by clicking the yellow triangle / red shield icon. By default all rules are configured in log&pass mode to prevent traffic from being unnecessarily blocked.
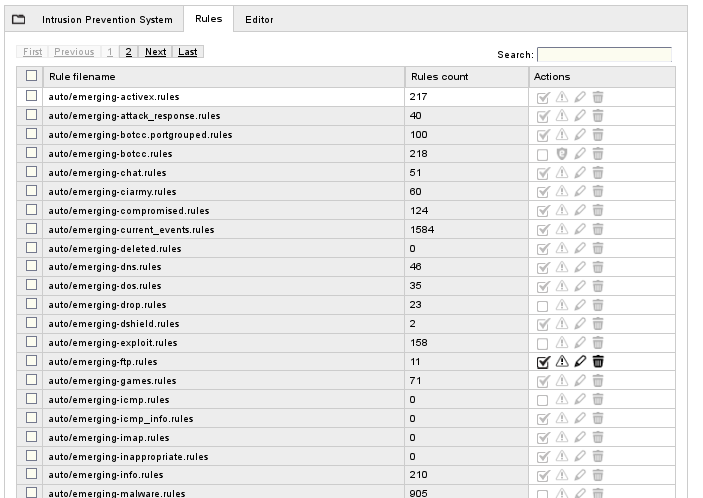
Next you should review the available categories of rules (and rules themselves) and determine which rules you want deployed in log&pass (IDS, Intrusion Detection System) mode and which you want in log&block (IPS, Intrusion Prevention System) mode. You can review the categories from the Rules tab of the interface and toggle the mode (pass or block) by clicking the white triangle / black shield icon. By default all rules are configured in log&pass mode to prevent traffic from being unnecessarily blocked.
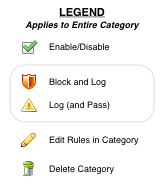
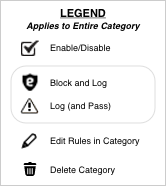
Legend - IPS Categories
Review and Configure the Rules (Individually)


You may also drill into any given category and review the individual rules contained within by clicking the "Edit" icon (pencil). Once there you can enable or disable individual rules as well as configure each rule to be either a log&pass or log&block rule.
Still valid for 2.5
Am I wrong or is there an inconsistency concerning the description of what rules set to "Block" do? In Help for 2.5 it is stated that:
"By default, the policy for all the rulesets is set to alert. This behaviour can be changed by clicking on the alert icon to toggle the policy into block and the icon into a red shield. After clicking on the Apply button, that ruleset will not cause alerts anymore, but all the traffic that matches its rules will be blocked."
In this knowledgebase article the legend describes the "Shield" as "Block and Log".
Is there a possibility to ONLY block as described in "Help"? Certain rules are triggered A LOT (on our system here in China) and therefore fill up our logs when we would rather have those entries dissapear all together.