Applies to platform: Hotspot 3.2 and 5.0; UTM 3.0 and 5.0 with Hotspot module.
Last updated: 5th March 2018
This article guides you in the setup of two Endian Appliances that act as master and satellite in an Hotspot. This guide can be applied for the setup of more satellites, by simply repeating some of the tasks described below.
The Master/Satellite setup can prove useful when wide areas should be covered and one hotspot does not cover them completely. When such an architecture is employed, all the management and accounting tasks for users and tickets are carried out on the master only. On the satellite systems only the Reports section (under the Hotspot Administration Interface) will be available.
Requirements
To set up a Master and Satellite Hotspot, you need two Endian appliances or more. It is not necessary that they are the same model.
When configuring the satellites, the following data of the master are needed:
- IP Address of the uplink (RED IP) and of the Hotspot subzone (HOTSPOT IP).
- Configuration of the VPN client account: Certificate, username, and password.
- Hotspot's password.
Suitable appliances
The following appliances can not be used in this scenario.
- Master role: Mini 10, UTM Mini 25, UTM Mini 25 WiFi and UTM Mercury 50
- Satellite role: Mini 10, Software 10, Virtual 10.
As a general rule, the biggest appliance should be selected for the Master role, while the other for the Satellite. It is not necessary to have identical appliances: In our example, we show a UTM Virtual as Master and a Mercury 50 as Satellite.
Introduction
The connection between the Master and its satellites uses OpenVPN, hence OpenVPN accounts are created on the Master and used by each Satellite to create a VPN connection between the Master and each Satellite.
The whole setup is quite long but straightforward. For the sake of clarity, tasks to be done on the Master hotspot are labelled with M1, M2, and so on, while the tasks to be carried out on the Satellite are labelled S1, S2, and so on.
M1. Create the VPN tunnel
Define the OpenVPN server instance on the Master.
Go to the VPN Menu section (VPN > OpenVPN server), set up an OpenVPN instance with a routed connection type and an ad-hoc network range (in this case 172.16.15.0/24) that must be different from any other subnets already present on the Endian Appliance.

Click on Save, then on Apply settings.
The Master always acquires the first available IP Address of the subnet and acts as the gateway for all the satellites. Here, the Master's IP is 172.16.15.1.
M2. Create the User Account for the Satellite
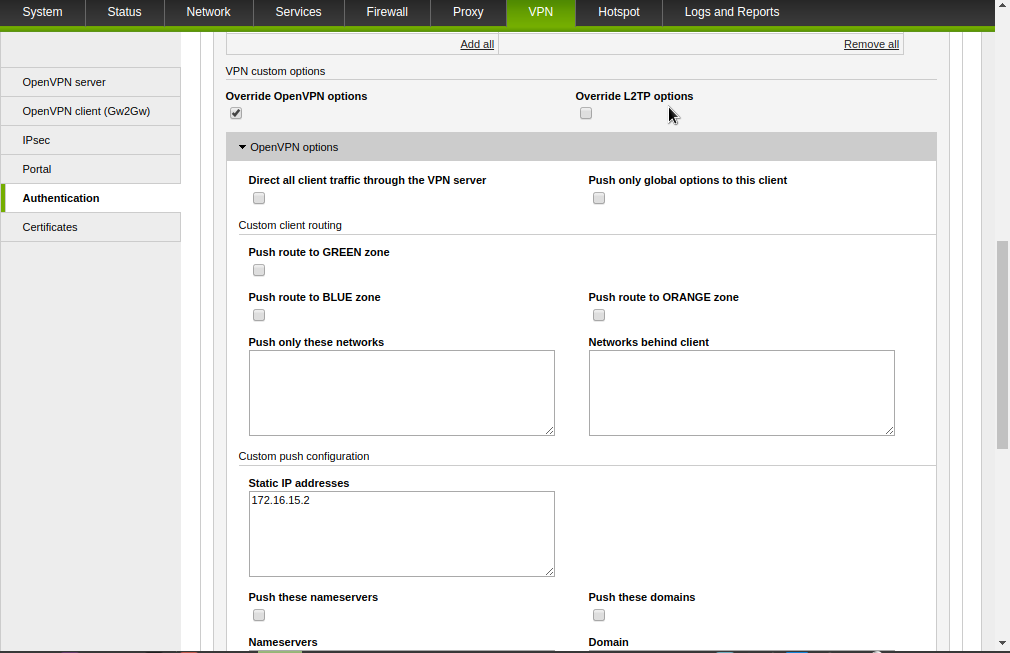
Go to Menubar > VPN > Authentication and create a unique OpenVPN account with a static IP address for each satellite system. The IP addresses assigned to the satellites must fall within the subnet defined in the OpenVPN instance.

To configure the OpenVPN account with a static address you should tick the box Override OpenVPN options, scroll down the page and write in the Static IP addresses box the chosen IP. Good practices suggest to assign to each new Satellite the lowest IP available, therefore we write in the box the IP 172.16.15.2.
Click on Save , then on Apply settings.
If you need additional satellites, repeat this procedure to create other VPN users.
Once all the necessary client accounts have been created and before activating the Master/Satellite configuration, it is necessary to verify that the OpenVPN connection be setup correctly. Remember also to download the VPN certificate for each client, because you will need to import it in the satellite.
S1. Create the OpenVPN client connection
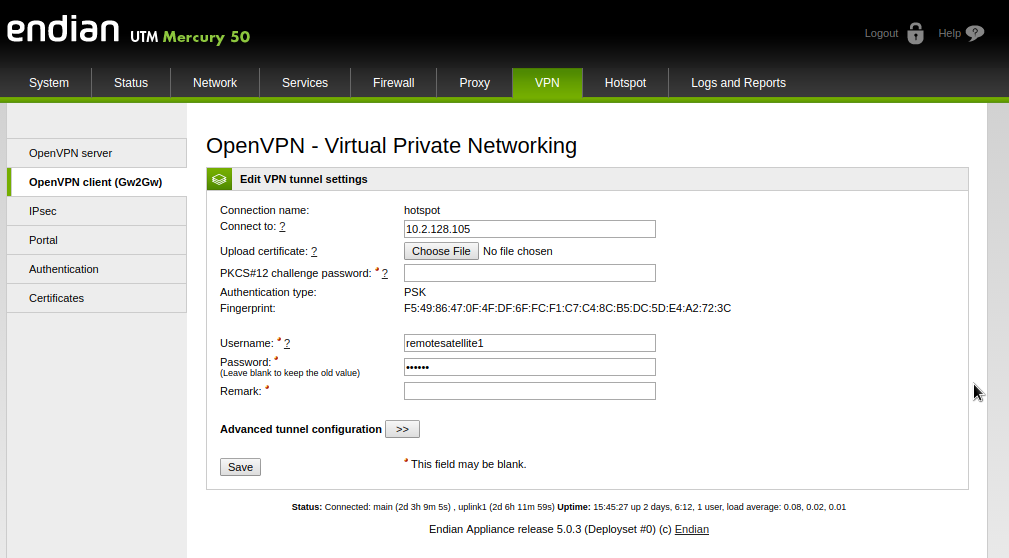
On the Satellite, go to Menubar > VPN > OpenVPN client (Gw2Gw) to add a new tunnel configuration using the data of the account created in the previous step. Here you should set up:
- in the Connect to field, write the Red IP of the Master device, here 10.2.128.105. If you have chosen a different port for the OpenVPN instance (for example 1196), you should write it as IP:Port number, hence 10.2.128.105:1196).
- Upload the certificate that you have downloaded from the Master device (under VPN > OpenVPN server > Download certificate).
- the username and password of the VPN user created on the Master in previous step.
S2. Connect to the Master
To complete this task, save the settings. The connection will be initiated and in short it will be established. A successful connection will be marked by the Status that will change to established:

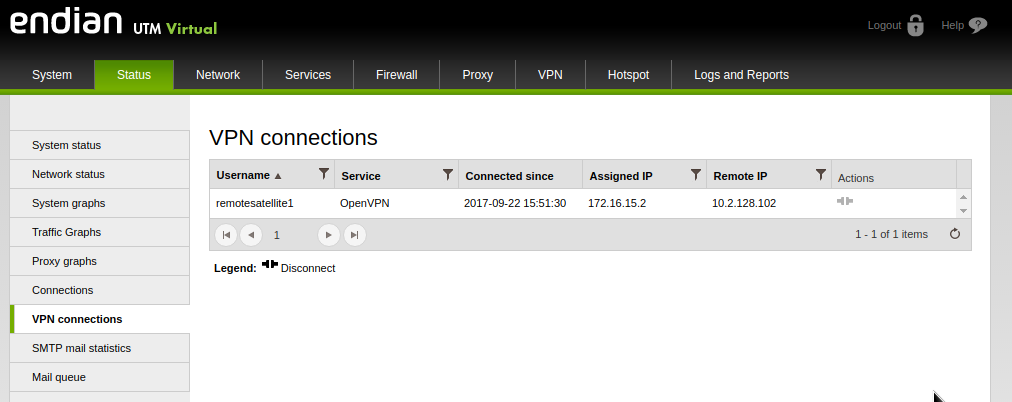
If everything works correctly, you should also see the Satellite remote device on the Master under Status > VPN Connection. You will also see some additional information about the VPN Connection as well.
Once the VPN traffic can flow freely between the two appliances, it is possible to activate the Hotspot on the Master and complete the setup.
M3. Activate the Hotspot on Master
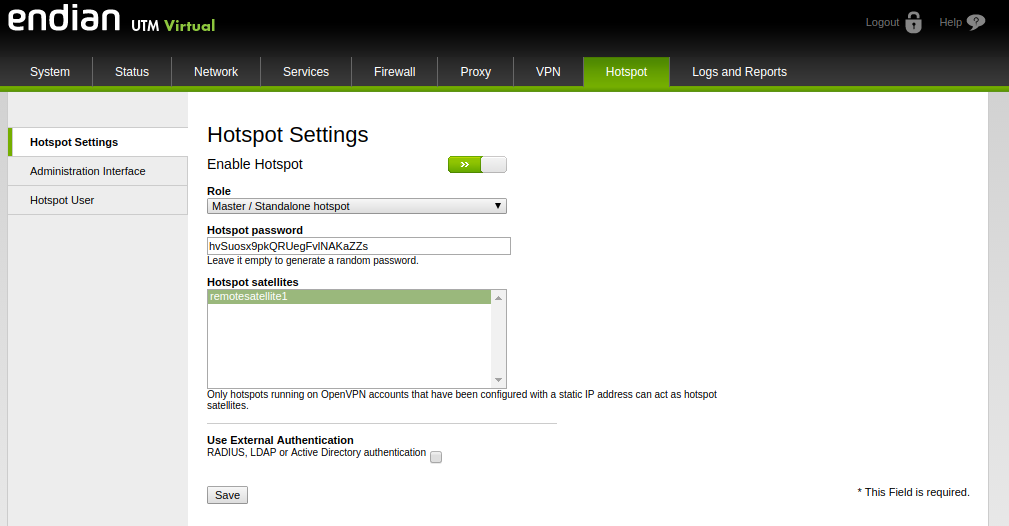
Go to Menubar > Hotspot and click on the Enable Hotspot switch to start the hotspot.
M4. Choose satellite
Once the hotspot is running and the VPN client connected, the Hotspot satellites list in the Hotspot's main page will be populated and you can choose and enable the necessary hotspot satellite systems. On this page you can also see the Hotspot Password that would be required on each satellite device.
Click on Save and then on Apply settings to activate the changes.
The set up of the master is now finished, so proceed to complete the Satellite setup:
S3. Activate the Hotspot on Satellite
Enter the Satellite's hotspot menu Menubar > Hotspot > Hotspot settings and choose Satellite hotspot as Role.
Enter the Hotspot IP in the Master Hotspot IP address option and the Hotspot password in the Master hotspot password option (you can found it on the Master under Menubar > Hotspot > Hotspot settings > Hotspot password), and select the Hotspot VPN tunnel from the drop-down menu.
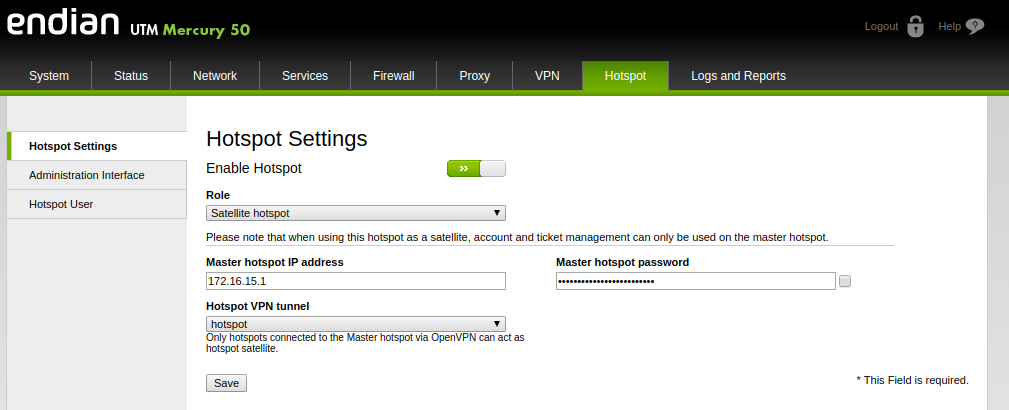
Click on Save and then on Apply settings to activate the changes.
To verify that the satellite system is properly connected, open the satellite system's Hotspot Administration interface: Only a limited interface shows up, containing the Reports section and nothing else: all the management task are delegated to the Master.

The setup in now complete: both the Master and the Satellite systems are correctly working.
Comments