Applies to platform: All UTM, All Edge
Last updated: 27th February 2017
This lesson will illustrate the necessary steps to configure a very simple Net2Net OpenVPN tunnel (called also Gw2Gw, gateway-to-gateway) between two Endian appliances.
In this example, one Endian will act as the OpenVPN server (called Site_A in the reminder) and the other one as a client (called Site_B) . The two Endian will then act as gateway for the respective local networks.
Note
Requirements
To have already set up the OpenVPN server and a VPN user on the Endian that will act as server.
Certificate from the OpenVPN server (Site_A).
Configuration example
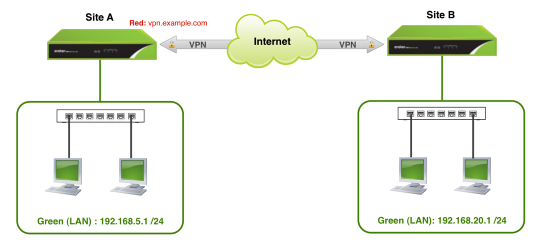
The following diagram shows a typical setup of a Net2Net OpeVPN, showing the GREEN subnet that lies behind each gateway. We'll be creating a Net-to-Net connection to allow communication between the two internal Green (LAN) networks of each Endian device.
Set up OpenVPN server and OpenVPN user
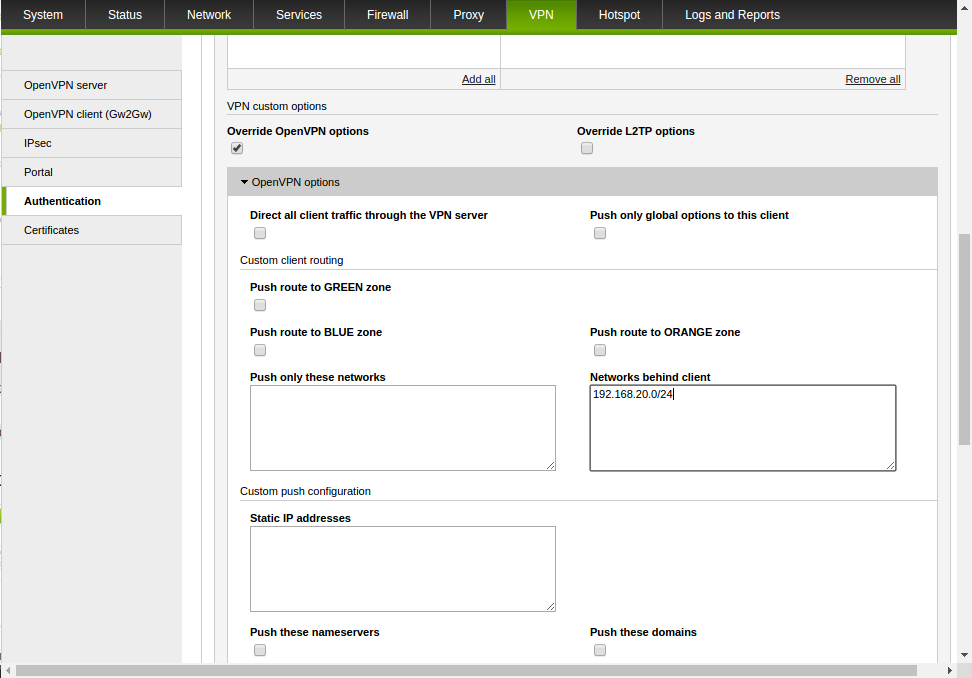
This step has been covered in this article. However, the net2net setup requires that another option be configured for the VPN account, otherwise the Net2Net VPN will not work. This option is called Networks behind client, and has the purpose to let the Site_A set up the correct routing between the devices lying in its GREEN network to Site_B's networks. To configure this option, go on Site_A's menu under VPN > Authentication, then edit the user to be used on Site_B for the connection. Here, tick the Override OpenVPN options. In the OpenVPN panel that appears, write in the textarea underneath Networks behind client the GREEN network of the Site_B in CIDR notation.
Note
Once you have filled in all the necessary fields, click on Save to proceed.
Setup the VPN Client Device (Site_B)
On the client device, from the Endian main menu select VPN > OpenVPN client (Gw2Gw). Once there, you will click the Add tunnel configuration button to begin the creation of the client VPN connection.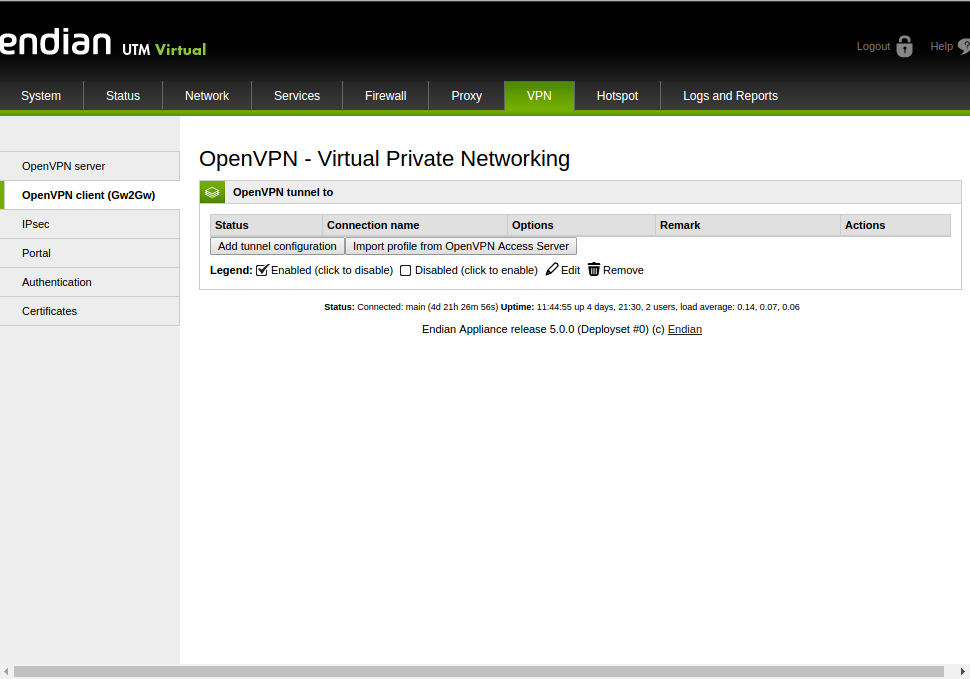
Configure the VPN Account (Site_B)
Now we can configure the setting for the client, Site_B. 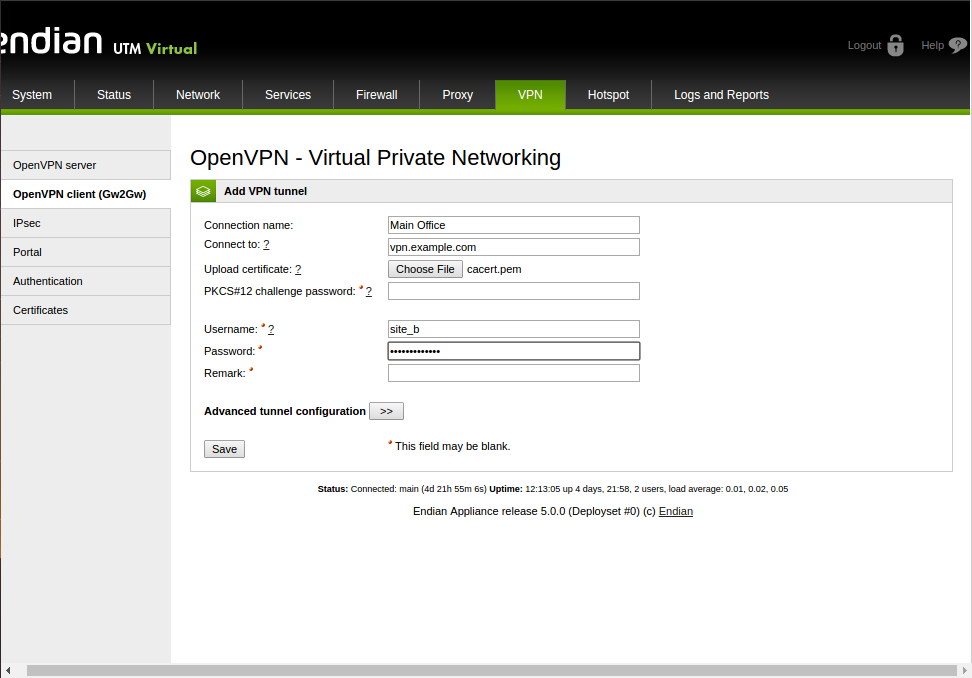
The first field, Connection name, is just a generic string to describe this VPN connection. The next field, Connect to, is where you will provide the IP address or hostname (we put vpn.example.com as an example) of the Endian VPN server. Next you need to upload your server certificate that you had downloaded from Site_A. Last, you must provide the Username and Password of the VPN account configured on Site_A. Since we're setting up a simple connection, we'll leave the Advanced tunnel configuration options as default. Once you've completed the necessary fields, click Save to proceed and initiate the client VPN connection.
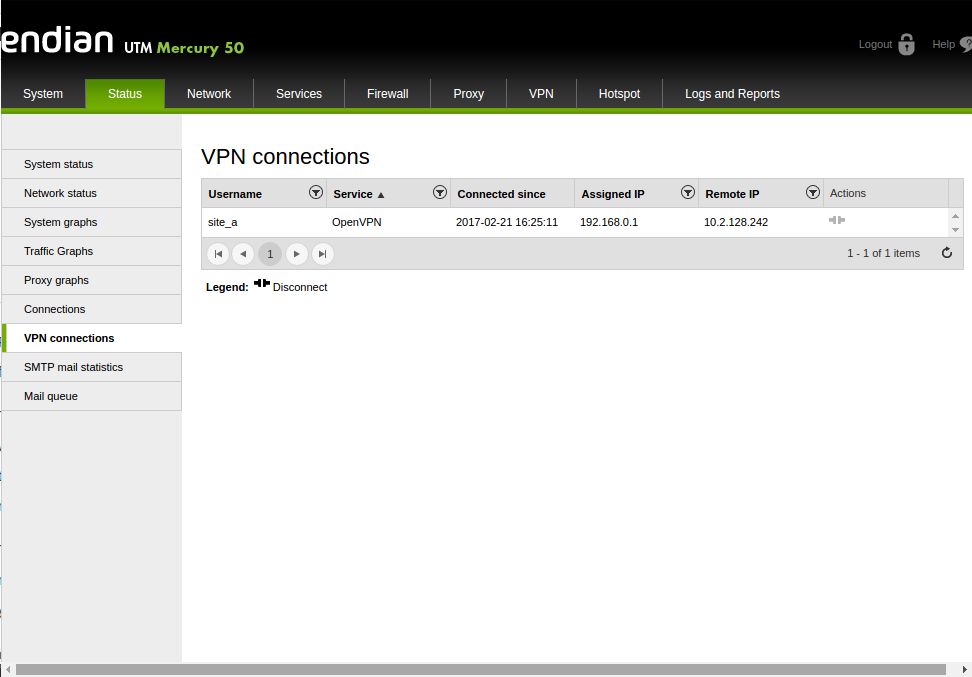
Verify Connection (Site_A)
If all goes well, we should see the Site_B remote device show up on Site_A under the VPN Connection section of our VPN server (which is found under Status > VPN Connection on Site_A). Once the user is connected you can view relevant VPN user information from this screen as well.
Verify Connection (Site_B)
We can also verify the client side is connected by confirming the Status changed to established, which indicates a successful VPN connection.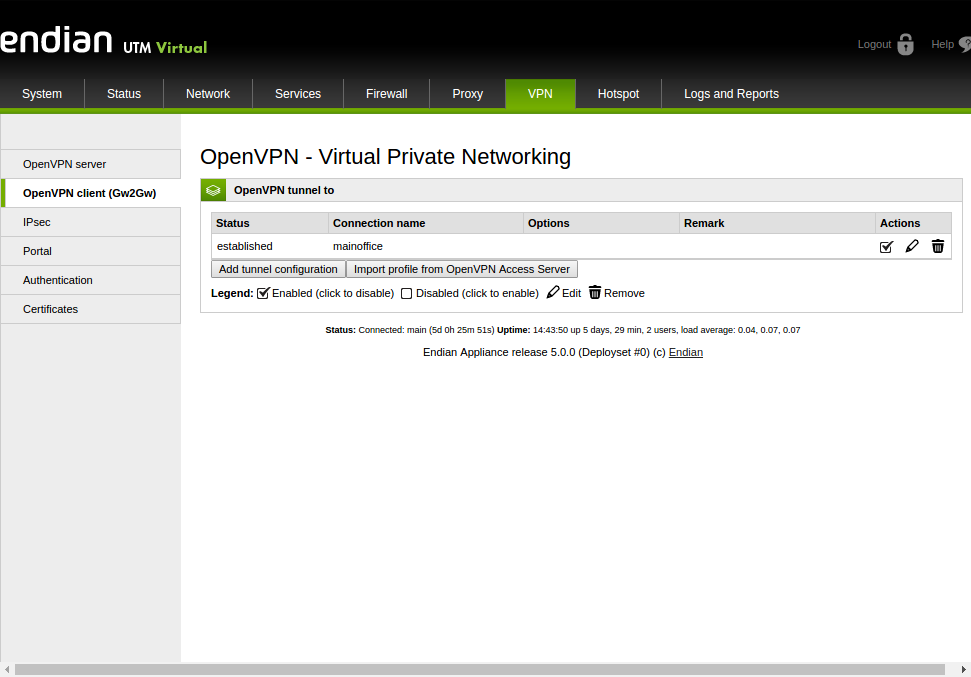
Test Internal Connectivity
Now you should be able to successfully test all internal accesses to remote devices (resources) from both sides of the VPN tunnel. Anything from a simple ICMP ping to an RDP session or a remote web server access should be accessible across the tunnel.
The "This step has been covered in this article" not exist
Same problem as Jorge....
Thanks, we fixed the link, sorry for the inconvenience. :)